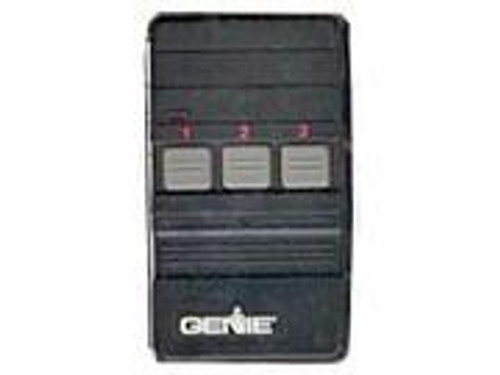
The Genie GPT90-3 Three Button Remote is a multifunction remote controller designed for use with 12 switch systems. Unfortunately, this specific model is no longer available, but you can opt for the Genie GM3T as a suitable replacement. The GPT90-3 remote features a 390 MHz frequency, 12 switch code block, and a convenient visor style for easy access.
Safety is a top priority when it comes to operating your garage door with the Genie GPT90-3 Three Button Remote. Please ensure proper installation and adherence to safety precautions provided in the warning section. Installing the transmitter correctly and ensuring the safety reverse function of the door operator works as required are crucial steps to prevent accidents.
To set your personal security code on the remote controller, follow the detailed instructions provided. Matching the security code switches on your remote controller with those in your opener is essential for smooth functionality. This unique code ensures that only your remote controller operates your door, adding an extra layer of security.
With straightforward operation, simply point the remote controller at the garage door and press the button to open or close it. The door will automatically stop at the end of the open-close cycle for added convenience. The remote controller also allows for battery replacement without the need to reset security codes, making maintenance hassle-free.
For lost or stolen remote controllers, it is recommended to change the security code settings on all your devices for enhanced security. Make use of the Genie GPT90-3 Three Button Remote for a convenient and secure garage door operation experience.
NO longer available use Genie GM3T
Genie GPT90-3 use with 12 switch units
Genie GPT90-3 three button remote,
390 mhz, 12 switch, visor style
Dimensions: 4.5 x 2.5 x .75 inches 27705T
GENIE GARAGE DOOR OPENER THREE-BUTTON REMOTE GPT90-3 (12 switches & 390 frequency) ************* WARNING ************* Moving Door can cause serious injury or death. · DO NOT install transmitter unless the door operators safety reverse works as required by the door operators manual. · Wall control must be mounted in sight of door, at least 5 feet above floor and clear of moving door parts. · Keep people clear of opening while door is moving. · DO NOT allow children to play with the transmitter or door operator. If safety reverse does not work properly: · Close door then disconnect operator using the manual release handle. · DO NOT use transmitter or door operator. · Refer to Door and Door Operators Owners Manuals before attempting any repairs. _________________________________________________ Electrical Shock can cause serious injury or death. · Power cord must be unplugged before attaching any wires, · Be sure wire ends do not touch each other or other terminals. If you have questions or if you need a manual, contact the distributor or manufacturer of the operator. ****************************************************************************************************************************** MULIT-FUNCTION REMOTE CONTROLLER For use with 9 and/or 12 switch systems. NOTE: This remote controller must have its internal security code switches set to be identical to those in your opener before it will work. Your code block with dip switches can be found where you see the antenna wire hanging from the motor head (you may have to take the lens cover off). If antenna wire is not hanging from motor head then you have an external receiver which is a black box approx. 6" x 2" mounted somewhere in the garage with a antenna wire hanging from it (pop off cover to find code block with dip switches). This private code makes it possible for your remote controller to operate your door, but not your neighbors. It also prevents their controller from opening your door. HOW TO SET YOUR PERSONAL SECURITY CODE Remove battery cover (lower front cover) Press firmly below arrow and slide cover off. See label inside battery cover for switch identification Slide three (3) or More Security Code Switches to set your personal security · Use ballpoint pen or small screwdriver. · Slide firmly to one end of slot or other. NOTE: If your original remote controller includes one time punch out keys instead of switches, set security code switches of the new remote controller to OFF or down position to match keys that have been punched. Hold remote controller next to power unit security code switches. Slide Operator Security Code Switches to match remote controller security code switches. Slide Right Function Switch to 9 or 12 to match number of security code switches on your power unit. Slide Left Function Switch from RUN to SET. Press Desired Sure Touch Control Buttons until LED flashes. Release button. Return Left Function Switch to RUN. · Repeat steps 2 thru 8 for each control button. Reset Security Code Switches to the UP position after programming of all Control Buttons is complete. Replace battery cover. · Slide battery cover back in place over battery. · Press firmly and slide forward to snap in place. YOUR REMOTE CONTROLLER IS READY TO USE. REMOTE CONTROLLER SECURITY CODES CAN BE CHANGED AT ANY TIME. ALL REMOTE CONTROLLER AND GARAGE DOOR OPENER SECURITY CODE SWITCHES MUST MATCH TO REMOTELY CONTROL YOUR DOOR OPENER. REMOTE CONTROLLER OPERATION: Point the remote controller at the garage door and press button. The door will open or close. Press the button while the door is moving. The door will stop. Press the button again. The door moves the other way. Door automatically stops at the end of open close cycle. For maximum range, point remote controller at the door and press button. VISOR CLIP ATTACHMENT: Attach visor clip to remote controller. Spread wire ends into holes in sides of remote controller. Clip can be inserted up or down. BATTERY REPLACEMENT: Remove battery cover. Press firmly below arrow on battery cover and slide cover off Install new battery in same position. Use Eveready 9V Classic No. 216. Replace cover. NOTE: Security Codes DO NOT need to be reset after battery replacement. LOST OR STOLEN REMOTE CONTROLLERS: If your remote controller has been lost or stolen, it is recommended that you change the security code settings on all your remote controllers and receivers.


